Redmine Wiki is a powerful editor, sadly the Redmine developers have forgot to add configurable numbering to the headings. So to workaround this for having Redmine numbered headings, we have to add CSS code to Redmine 3.x and 4.x.
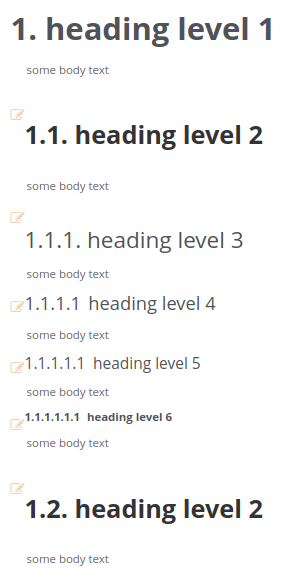
As a result you want to have some thing like this on your wiki pages?To get this feature, we have sadly to develop a little bit in CSS language.
Enable Redmine numbered headings via CSS
You need to know where your redmine installation folder is residing, along what Theme your redmine installation is using.
Identify your Redmine installation folder
To find the installation follow these instructions How to find Redmine installation folder?
Identify your Redmine used theme
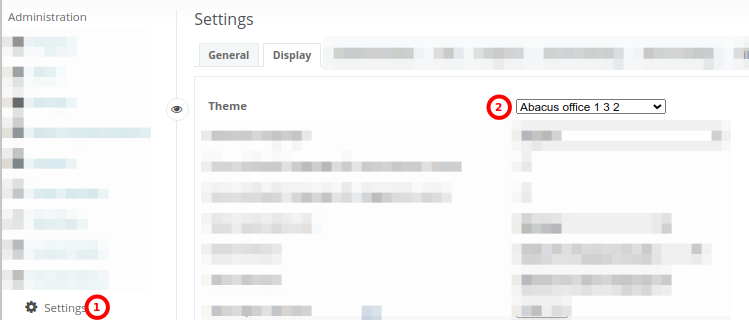
Your theme is configured under the Redmine > Administration > Settings > Tab Display. The short path to this is this link part
https://<yourRedmineDomainAndPath>/settings?tab=display
This looks like this screenshot. Here we have abacus as the theme installed.
Modify the corresponding CSS for enabling Redmine numbered headings
Knowing both, your installation folder and your used theme it is now to find the corresponding CSS files to modify. So go to your installation folder and go to
public/themes/<yourThemeFolderOftenIncludingVersionNumber>
Usually the theme developer provide a custom.css, or a overrides.css or something similar. Search for such a file. If you find it, it is easy going to add the code. If you do not find such a file, you will have to go with trial and error from CSS file to CSS file.
/* add numbering to wiki headings */

div.wiki, div.wiki-page {
   counter-reset:h1s;
}
.wiki h1 {
   counter-reset: h2s;
}
.wiki h1::before {
   content: counter(h1s) ". ";
   counter-increment: h1s;
}
.wiki h2 {
   counter-reset: h3s;
}
.wiki h2::before {
   content: counter(h1s) "." counter(h2s) ". ";
   counter-increment: h2s;
}
.wiki h3 {
   counter-reset: h4s;
}
.wiki h3::before {
   content: counter(h1s) "." counter(h2s) "." counter(h3s) ". ";
   counter-increment: h3s;
}
.wiki h4 {
   counter-reset: h5s;
}
.wiki h4::before {
   content: counter(h1s) "." counter(h2s) "." counter(h3s) "." counter(h4s);
   counter-increment: h4s;
   margin-right: 0.4em;
}
.wiki h5 {
   counter-reset: h6s;
}
.wiki h5::before {
   content: counter(h1s) "." counter(h2s) "." counter(h3s) "." counter(h4s) "." counter(h5s);
   counter-increment: h5s;
   margin-right: 0.5em;
}
.wiki h6 {
   counter-reset: h7s;
}
.wiki h6::before {
   content: counter(h1s) "." counter(h2s) "." counter(h3s) "." counter(h4s) "." counter(h5s) "." counter(h6s);
   counter-increment: h6s;
   margin-right: 0.6em;
}
.wiki h7 {
}
.wiki h7::before {
   content: counter(h1s) "." counter(h2s) "." counter(h3s) "." counter(h4s) "." counter(h5s) "." counter(h6s) "." counter(h7s);
   counter-increment: h7s;
   margin-right: 0.6em;
}
After adding and saving this code, you can easily reload your browser, which is showing your a wiki page. After the reload you shall already see the differences of your changes. If nothing is showing try to modify a different file.